• Welcome to the CaliforniaSpecial.com forums! - You are currently viewing the forums as a GUEST. To take advantage of all our site features, please take a moment to join our community! It's fast, simple and absolutely free.

    If you have problems registering or can't log into your account, please contact Admin.

    Please Note: If you are an existing member and your password no longer works, click here to reset it.

1968 Trouble starting new engine

dpheyes

Well-known member
Joined
Oct 12, 2006
Messages
103
Location
Kodiak, Alaska
I've reached the end of my rope and am looking for any ideas to help get my engine started. Here's the situation:

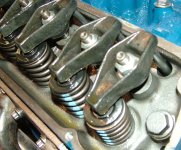
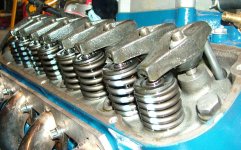
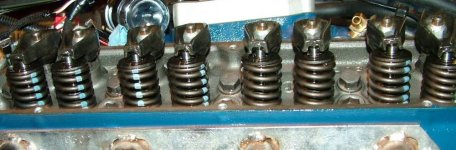
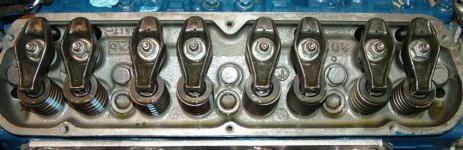
New/rebuilt 302/347 stroker
Fresh rebuilt Autolite 4300 4V carb
New modern style PMGR starter
New battery
New cables, plugs, wires, distributor, Pertronix, coil, etc.

I've had it nearly started several times, but have "killed" two batteries doing it. It is extremely hard to crank. If I take the plugs out it turns over pretty easily. When I put the plugs back in, it will barely turn over.

I've double-checked:

Transmission is in neutral. Hard to crank even with the clutch disengaged.
Rotation is correct.
Timing is set to approximately 6 BTDC.
Firing order is correct.
Negative battery cable is firmly grounded to bare metal on block.
Engine/firewall ground is firmly grounded to bare metal on block & firewall.

Any ideas greatly appreciated. It's been four long years restoring this and I neeeeeeeed to hear it running!

Doug
 

admin

Staff member
Administrator
Joined
Aug 18, 2002
Messages
2,056
Have you confirmed DTC by physically checking the piston position on #1 cylinder? (ie. spark plug out) And it corresponds to the rotor pointing to the #1 plug wire?

How's your fuel delivery? Is the carb getting gas into the intake?
 

CougarCJ

Well-known member
Joined
Jul 17, 2006
Messages
2,189
Long shot, but I have seen it happen twice. Incorrectly made engine guage feed harness.

If you have a new engine guage feed harness, double check the coil lead wire.
On the end of the engine gauge feed harness, there is a three wire plug. (two males, one female, the coil lead needs to be a male plug and on the edge.
 
OP
OP
D

dpheyes

Well-known member
Joined
Oct 12, 2006
Messages
103
Location
Kodiak, Alaska
Have you confirmed DTC by physically checking the piston position on #1 cylinder? (ie. spark plug out) And it corresponds to the rotor pointing to the #1 plug wire?

How's your fuel delivery? Is the carb getting gas into the intake?

Jon,

I pulled the RH valve cover and hand cranked the engine through several cycles and verified that everything is correct.

I have gas and it's firing if I can get it to turn over fast enough, but it's just not doing that. I've even been trying it with my 150 amp charger/starter hooked up, but I've never been able to get it to crank smoothly ( except when I pull the plugs). It's as if it's so tight the compression is preventing it from turning over easily.
 
OP
OP
D

dpheyes

Well-known member
Joined
Oct 12, 2006
Messages
103
Location
Kodiak, Alaska
Long shot, but I have seen it happen twice. Incorrectly made engine guage feed harness.

If you have a new engine guage feed harness, double check the coil lead wire.
On the end of the engine gauge feed harness, there is a three wire plug. (two males, one female, the coil lead needs to be a male plug and on the edge.

I've checked the wiring about 5 times, but you are right about incorrectly assembled harnesses, so I'll check again. But as I mentioned to Jon above, the real prolem is that the engine is so tight I'm having trouble getting it to turn over before it kills the battery, even with the charger connected and going full blast. After about 6 or 8 rounds, the battery is just not taking a deep charge any more.
 

J.Bart

Well-known member
Joined
Feb 12, 2003
Messages
800
try turning it over with spark plugs installed, but with the wires off of the plugs.
if it cranks ok with wires off, then it has to be timing issue.
cross wiring in harness, as mentioned, or the dist. 180 deg. out of time.

does it crank completely free with the plugs out? or just better than with them in???
 

rvrtrash

Well-known member
Joined
Apr 25, 2003
Messages
3,652
This early in the morning, I can only come up with two ideas. 1) There are two different firing orders for 302's. A lot of rebuilt engines use the newer firing order, the same as the 351W. 2) You may have a bad starter. The gear reduction starters are supposed to turn over anything (they use them on diesel trucks with 17:1 compression) so it's possible you got a bad one from the factory. I can't tell you how many new parts I've installed that have been bad right out of the box.

Steve
 

CougarCJ

Well-known member
Joined
Jul 17, 2006
Messages
2,189
I've checked the wiring about 5 times, but you are right about incorrectly assembled harnesses, so I'll check again. But as I mentioned to Jon above, the real prolem is that the engine is so tight I'm having trouble getting it to turn over before it kills the battery, even with the charger connected and going full blast. After about 6 or 8 rounds, the battery is just not taking a deep charge any more.

Double check the wire I identified in a wire schematic, I don't have my car handy.
 

nfrntau

Well-known member
Joined
Aug 15, 2004
Messages
1,020
Location
Rosharon, Texas
My thoughts lead me to your starter. Based on what you say, turns freely without restriction but bogs severely with some restriction (plugs in). I would try a different starter.
All the other advise is spot on as well. If you remove the plug wires and it does the same thing. Look to your starter. Check the teeth on the one you have when you remove it from the engine and check your flywheel teeth as well (at least the ones you can see) If there fine, I would get a high amp starter and give it another go.
Good luck and I really empathize with your situation.
While trying to start my 351, I found out the hard way it has a 302 rotation cam
 

robert campbell

Well-known member
Joined
Apr 10, 2007
Messages
4,321
Pull the plugs out and put a torque wrench on a 15/16 inch socket on the vibration damper bolt and tell me how much torque to hand crank the motor. The max to break it free as you hand crank it. 20 to 30 foot pounds is normal for a new engine. Sometimes gapless rings make it a bit higher.

If it is in this range then your short block is assembled correctly. If it is tight, I assume you have adjustable valve train? Hydraulic cam? I set most of my hydraulic cams at just barely "zero" lash for the first 20 minute break in. Did you use a drill motor to circulate the oil? If you did not sometimes the pumping up of the lifters tightens your original valve lash setting. Then the valves hang open and it will not start.

I would go over your valve lash one more time. One at a time every 90 degrees of the vibration damper. Ensure they are not to tight. Then check the torque to spin the engine again.

Or call me (360) 377-5164! I can talk you through it alot faster than I can type!! I have started a bunch of new motors over my career! I love to do it!! And I am very fussy about how it is done.

Rob
 
OP
OP
D

dpheyes

Well-known member
Joined
Oct 12, 2006
Messages
103
Location
Kodiak, Alaska
Status Report:

Well, now I'm really bummed... I had Friday off, so I spent the day trying some of your suggestions and double checking everything I could think of. Nothing seemed to work. I even had help when an ermine suddenly appeared in the garage and just stared at me! :eek: For those who don't know, an ermine is a very small, thin critter that looks like a miniature ferret. They turn bright white in the winter all over except the last 3" of their tails. But he didn't have any ideas either. :sad: He spent about 20 minutes inspecting the garage before he slipped back out under the door.

So yesterday evening, I said to hell with it and decided to start over. I pulled the engine and set it up on an engine assembly cart. After disconnecting everything, removing the plugs, the tranny, the clutch, etc. I still could not turn the engine by hand. I was able to do that before I put the engine in, and had spun the oil pump to lubricate everything, cranked it several times to make sure everything was good, etc.

A couple of things are beginning to worry me. When I first tried starting the engine after it was in the car, I was filling the system with coolant and noticed a small leak from the right front side of the intake next to the thermostat housing. I drained the coolant, pulled the intake, cleaned and replaced the gaskets, and retorqued everything. I checked for any water in the oil, but there wasn't any. I refilled everything and there were no leaks after two days. After I unsuccessfully tried starting it again, I pulled the plugs and noticed that they had a thin black film on them. It was apparently carbon and gas. Now I'm thinking that there could be another coolant leak somewhere internally. Probably the intake again.

So today, after pulling the engine last night, I am getting ready to pull the intake again and look for evidence of a coolant leak. After that, I'm still looking for more ideas. The ones you've given me have been great.

Doug
 
OP
OP
D

dpheyes

Well-known member
Joined
Oct 12, 2006
Messages
103
Location
Kodiak, Alaska
Rob,

Here are the pictures of the valve train. I'll call you shortly from the scene of the disaster! I had to crop them to make them small enough.

Doug
 

Attachments

  • DSCF7292.JPG
    DSCF7292.JPG
    204.5 KB · Views: 33
  • DSCF7293.JPG
    DSCF7293.JPG
    215.2 KB · Views: 28
  • DSCF7295.jpg
    DSCF7295.jpg
    70.5 KB · Views: 32
  • DSCF7297.jpg
    DSCF7297.jpg
    82.2 KB · Views: 36
OP
OP
D

dpheyes

Well-known member
Joined
Oct 12, 2006
Messages
103
Location
Kodiak, Alaska
Just an update:

After spending most of the weekend in the garage and after ruling out some things with Rob's help, I found that the intake manifold was leaking coolant into the crankcase. The water had filled the bottom of the oil pan and the oil pump was pushing nothing but water through the engine. This lack of lubrication had made the engine very hard to crank. I pulled the engine and am now carefully cleaning and examining everything to make sure there is no permanent damage to the cylinder walls etc. I plan on flushing the interior of the engine clean and then thoroughly lubricating everything to see if I canb get it to turn over easily by hand. If that works, I'll button it all back up, fixing the intake gasket leak. Then fill it with oil and spin the oil pump with a drill for a while to get everything all lubed. Then I'll fill the coolant and monitor it for leaks for a few days before trying to start it again.

If anyone sees anything wrong with that plan, or has suggestions, I'm definitely open to them.

I'm also interested in learning people's suggestions for intake gasket sets and or sealers to use. I have the good metal/rubber style FelPro sets for the valve covers and oil pan, but have just been using the stock FelPro gaskets for the intake.

Doug
 

Mosesatm

Well-known member
Joined
Jan 18, 2005
Messages
9,029
Just an update:

After spending most of the weekend in the garage and after ruling out some things with Rob's help, I found that the intake manifold was leaking coolant into the crankcase. The water had filled the bottom of the oil pan and the oil pump was pushing nothing but water through the engine. This lack of lubrication had made the engine very hard to crank. I pulled the engine and am now carefully cleaning and examining everything to make sure there is no permanent damage to the cylinder walls etc. I plan on flushing the interior of the engine clean and then thoroughly lubricating everything to see if I canb get it to turn over easily by hand. If that works, I'll button it all back up, fixing the intake gasket leak. Then fill it with oil and spin the oil pump with a drill for a while to get everything all lubed. Then I'll fill the coolant and monitor it for leaks for a few days before trying to start it again.

If anyone sees anything wrong with that plan, or has suggestions, I'm definitely open to them.

I'm also interested in learning people's suggestions for intake gasket sets and or sealers to use. I have the good metal/rubber style FelPro sets for the valve covers and oil pan, but have just been using the stock FelPro gaskets for the intake.

Doug

Intake gaskets should be installed in conjuction with sealant. A thin layer of RTV over both faces and huge beads front and rear should seal it all up.
 
OP
OP
D

dpheyes

Well-known member
Joined
Oct 12, 2006
Messages
103
Location
Kodiak, Alaska
Intake gaskets should be installed in conjuction with sealant. A thin layer of RTV over both faces and huge beads front and rear should seal it all up.

I tried Permatex Aviation Form-a-gasket, with high temp RTV in the four corners, but must not have gotten it aligned just right. I'll try RTV the whole way this time. Any suggestions on whether I should use a higher quality gasket set?
 
OP
OP
D

dpheyes

Well-known member
Joined
Oct 12, 2006
Messages
103
Location
Kodiak, Alaska
Not yet, but good point - Rob also mentioned it when I talked to him this weekend. I think I'll remove a main cap or two and a couple of rod caps to see if there is damage. Since I never got it started, I'm hopeful that nothing got messed up.
 
Last edited:
OP
OP
D

dpheyes

Well-known member
Joined
Oct 12, 2006
Messages
103
Location
Kodiak, Alaska
Another update:

After cleaning everything up, the internal engine parts (crank, cylinders, etc.) were very dry and I could not turn the engine over by hand. I inspected a couple of bearing and could see no damage. I hosed it all down with a spray can of medium weight oil (LPS 3) and let it sit for a day. The next day I was able to turn it over by hand. It started out stiffly, but after a couple of revs, it was turning smoothly. It's now apparent that the water leak and pumping water from the bottom of the pan washed all the oil off everything and caused it to stiffen up. Luckily the engine never did get started originally.

Last night after cleaning the mating surface thoroughly, I installed a new set of intake gaskets (FelPro 1250) with the silicone sealing beads built in around the intake and water ports. After letting it all cure for the day, I'll finish putting everything back together and drop it back in the car tonight. I'm going to put a large drain pan under it, leave the oil pan drain plug out, and fill the cooling system completely. I'll leave it that way for a day to make sure the intake isn't leaking water again. If that goes well, I'll fill it with oil and begin the process of getting it started again. If I can get it started for a minute or two, I'll drain and replace the oil and filter so there's no crud left in there.

Thanks everyone for the advice and suggestions. I really appreciate them.

Doug
 

Midnight Special

Well-known member
Joined
Nov 5, 2005
Messages
3,714
Location
Grass Valley, California
Another update:

...Last night after cleaning the mating surface thoroughly, I installed a new set of intake gaskets (FelPro 1250) with the silicone sealing beads built in around the intake and water ports. After letting it all cure for the day, I'll finish putting everything back together and drop it back in the car tonight....

Doug

Doug, Please clarify. You're not letting it cure before you torque the intake manifold bolts, are you??
 
OP
OP
D

dpheyes

Well-known member
Joined
Oct 12, 2006
Messages
103
Location
Kodiak, Alaska
Doug, Please clarify. You're not letting it cure before you torque the intake manifold bolts, are you??

Tim,

No, I applied the gaskets with sealer and torqued the manifold on while it cures. I'll retorque after I get it started and it's had a chance to heat up.

Doug
 
Top