• Welcome to the CaliforniaSpecial.com forums! - You are currently viewing the forums as a GUEST. To take advantage of all our site features, please take a moment to join our community! It's fast, simple and absolutely free.

    If you have problems registering or can't log into your account, please contact Admin.

    Please Note: If you are an existing member and your password no longer works, click here to reset it.

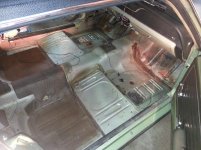
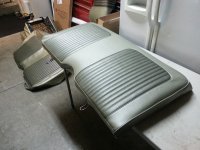
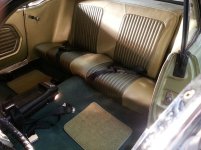
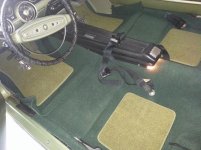
1968 new interior and upholstry DONE !

Edward Bodoh

Well-known member
Joined
May 26, 2012
Messages
230
Location
Suisun City
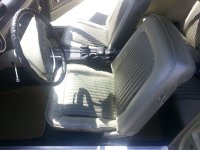
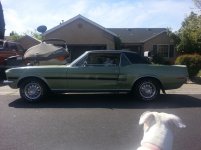
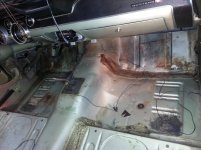
Just finished 3 day project including new upholstry, carpet and a few other small items. Completed in my garage...sharing some pics. And if I never have to crimp another hog ring again my feelings will not be hurt....lol. :icon_no:
 

Attachments

  • 20130322_000132.jpg
    20130322_000132.jpg
    106.3 KB · Views: 80
  • 20130322_000116.jpg
    20130322_000116.jpg
    114.2 KB · Views: 81
  • 20130322_235146.jpg
    20130322_235146.jpg
    251.7 KB · Views: 88
  • 20130323_004920.jpg
    20130323_004920.jpg
    106.4 KB · Views: 82
  • 20130322_144922.jpg
    20130322_144922.jpg
    130.5 KB · Views: 92
  • 20130326_113623.jpg
    20130326_113623.jpg
    245.3 KB · Views: 83
  • 20130326_113520.jpg
    20130326_113520.jpg
    93.6 KB · Views: 81

dalorzo_f

Well-known member
Joined
Jan 7, 2006
Messages
1,886
Location
Brisbane Australia
Yep, especially the ones on each side of the hump in the bottom of the rear seat!

Nice, work! And nice to be able to say "I did it" when folks ask! :wink:
 

Forsche

Well-known member
Joined
Jan 12, 2013
Messages
219
Just finished 3 day project including new upholstry, carpet and a few other small items. Completed in my garage...sharing some pics. And if I never have to crimp another hog ring again my feelings will not be hurt....lol. :icon_no:

Its looking very nice. Congrats! Thats one job that I don't think I want to tackle.

Steve
 

sam

Well-known member
Joined
Jan 2, 2003
Messages
494
Boy that looks great. Love the color. Looks like you are a perfectionist...........
Sam
 

6t8-390gt

Well-known member
Joined
Jul 19, 2004
Messages
490
Location
Central Virginia
Great pics - any advice as I am getting ready to do my covers in the next week or so.

I'm no expert; but I'll pass along some advice I was given before doing my first set.

1. Buy a set of quality seat buns (foam)
2. Buy quality hog ring plyers and good hog rings (I got my hog rings from a local shop)
3. Set the vinyl out in the warm sun to warm the vinyl
4. Take your time to get the covers on straight! The first set I did I measured the center of the seat bottom and lined up the center stitch to the mark on the steel frame...did the same for the seat back, put the two together and found the stitching to be off a bit. Second set of seats I did I measured the center of the seat bottom and installed cover, put seat together and marked the position of the center stitch, took seat apart and installed cover on seat back! Perfect!

I purchased the burlap from the local Wal-Mart instead of a mustang shop and saved a few bucks. I also welded the "recall" brackets to the seat frame before covering the seats.

Danny
 

robert campbell

Well-known member
Joined
Apr 10, 2007
Messages
4,321
Crimping new hog rings..... easy...
Cutting old hog rings to remove the old upholstery..... major pain in the a__.

Rob
 

dalorzo_f

Well-known member
Joined
Jan 7, 2006
Messages
1,886
Location
Brisbane Australia
Well, as I use a small bolt cutter (12") to remove the old hog rings, that part is easy. Recrimping is a PITA as I miss about 1 in 4 rings hitting the listing on the first try.
 

dalorzo_f

Well-known member
Joined
Jan 7, 2006
Messages
1,886
Location
Brisbane Australia
Some tips I have posted elsewhere in the past:

Just did two sets of 68 seats, had never done them before. A few tips based on my experience;

1. If they are in good shape, take them apart carefully, take notes, and take pictures. Keep the old listing wires, even if rusted for reuse or reference for making new ones. Mark where the originals used hog rings, misplaced ones can wrinkle the final lay of the vinyl. Wire coat hangers make great listing wire if you need new.

2. Repair any broken/sagging springs. The trimmer at the shop doing my body/paint and conv top got me "zig-zag" and it only takes a little time to figure out how to bend it up to fit. Makes a huge difference if you have worn springs.

3. Buy a hog ring cutter or small pair of bolt cutters (I bought 12" ones after wrecking my hands taking the first set apart). One of the best $7 investments I've made. Side cutter won't work ( I broke two) and twisting out the old rings with pliers wrecks the wiring and is very tedious. BUY LOTS of hog rings if you are stripping to bare frames, I went thru almost two bags (the ones they say do a whole set) on each cars seats.

4. If your going to repaint the frames, consider powdercoating. I painted my convertible seat frames, powdercoated the coupes. A little bit more for PC but way better look and way faster. (Assuming your going for a full strip/restore). If you don't have the drivers seat hinge pin repalcement, get it. It bolts on and was a safety recall. I heard on FoMoCo.com you can still get one free from Ford, but don't know if its true. Think NPD sells 'em for $20 or so. Way stronger then the original welded pin.

5. Get new seat foams if yours are old/original. Not cheap but well worth it. When removing the old foams be careful with the upper part on top rear of the seat and the two strips down the sides of the back. They are not reproduced.

6. Get a good pair of hog ring pliers. You DO need the right tool. It will save heaps of time and frustration.

7. On the rear seats there are two wires running down the side of the hump. These are HARD to hog ring. I used a 8" piece of coat hanger wire, bent it into a U shape and pulled the listing wire from the top down to the frame from below with vise grips. I could them hog ring from below. This took about 20 mins on my second set, from above on the first (before I came up with this plan) it took an hour or more and a lot of missed rings that had to be cut out.

8. New burlap on the frame is nice, the wires are not necessary. I also placed a piece of carpet underlayment between the burlap and the foam on the seat buns front and rear. It will keep the foam from sinking into the springs. A tip my shop trimmer gave me.

9. Soften the vinyl in the sun, or in the dryer (heard about this, here the Queensland sun is real hot so didn't try that one). If they seats are tight (and they will be) work 'em on as far as you can, then hit em with some heat (sun or hair dryer). This will soften the vinyl and allow it to stretch a bit over time. I got a bit agreesive on my fisrt seatback and put a small tear in the stitching, luckily it was in a not too visible spot and repairable. Go slow and take your time. They will stretch and amazing amount if you're patient.

10. Take your time and have fun! It a bit time consuming, but a weekend or two is plenty to get it done.

I found the books to be of some value, the Osborne FAMs show parts, numbers of hog rings, etc. The Art Trantafello Interior Resto Guide book is "OK", has some general tips, but was of marginal use for the price (here it ran me $30!). There are some sequence tips, what to hog first, how to roll the vinyl on the frame. If you want this info I can paraphrase it if you; "start in the middle, work your way out from there, roll the corners over the frame carfully, check alignment of seams before placing any rings".

Sorry if its a bit long, but I wish someone would have told me some of these before I "learned by doing".

Good luck!

Oh, I tried Distinctive Industries and TMI. The TMI was a bit harder to fit (not much) but looks better, IMHO.

Let me know if you have any questions, happy to help out if I can.
 
Last edited:
OP
OP
E

Edward Bodoh

Well-known member
Joined
May 26, 2012
Messages
230
Location
Suisun City
Thanks for the good comments. Looks like everyone posted up good tips. Being a night owl when it comes to work on the cs...I used my pedestal floodlights to heat up the vinyl. Way faster than the sun. Used a small pair of hogring pliers and my palms are still paying for it. Get a nice large pair. And yea I also used some of the old hogrings I pried off. The new package was short. Measurements are a good idea. Didn't replace the foam though. New foam is larger and i'm sure would have been harder to stretch over. All in all I'm proud I did it though guys....thanks and happy spring cruisin !
 
OP
OP
E

Edward Bodoh

Well-known member
Joined
May 26, 2012
Messages
230
Location
Suisun City
Forgot to mention...be very careful the clips you attach to the new backerboard for driver and passenger back of seats...line up exactly to the holes when you press down on them. One wasn't quite lined up and crumbled the new backerboard where clip attached a bit. Almost lost my cool on that one. Cut pilot holes on the overlapping vinyl for these clips. Commom sense. And yea TAKE YOUR TIME and enjoy the work. Pays off....lol.
 

gtcs1

Well-known member
Joined
Jun 17, 2006
Messages
350
6. Get a good pair of hog ring pliers. You DO need the right tool. It will save heaps of time and frustration.

Let me know if you have any questions, happy to help out if I can.
Hi, any suggestions as to best brand/manufacturer that I should use. Thanks for the tip.
 

dalorzo_f

Well-known member
Joined
Jan 7, 2006
Messages
1,886
Location
Brisbane Australia
And on the "larger" new foam, I've not noticed. Not mushed and 40 years of compression/wear, and never had significant issues.

If you do reuse old foams some added loft may be required.

On my bench seat I did have to resue some of the old foam, the bench seat buns are not reprodcued and are quite different to the buckets. I took a pair of new foams, cut out areas and contact cemented in place to make franken-foams. For worn/compressed bolster areas in the OEM that were reused, a layer of thin foam and some insulation/padding stuff I picked up from a commercial constuction site lofted the lower areas a bit to fill out the new upholstery.

Some use plastic bags on the foam to provide some "slip", I found a light spray of silicone helped on the corners of the faom.
 
Top