• Welcome to the CaliforniaSpecial.com forums! - You are currently viewing the forums as a GUEST. To take advantage of all our site features, please take a moment to join our community! It's fast, simple and absolutely free.

    If you have problems registering or can't log into your account, please contact Admin.

    Please Note: If you are an existing member and your password no longer works, click here to reset it.

1968 J-Code GT/CS Restoration Thread

x-codegtcs

Well-known member
Joined
Sep 5, 2002
Messages
549
Location
Kaysville, UT
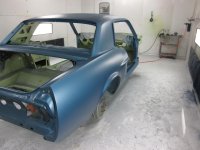
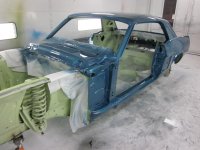
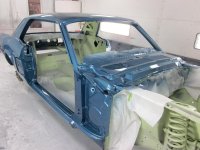
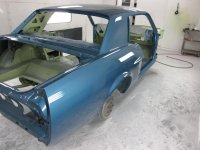
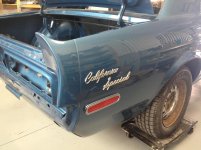
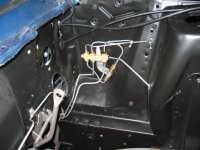
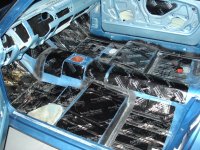
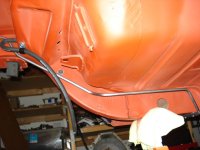
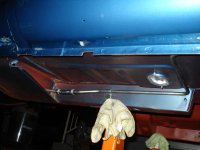
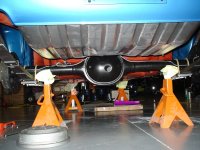
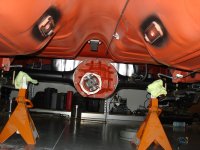
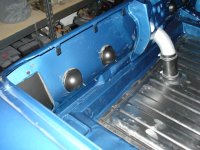
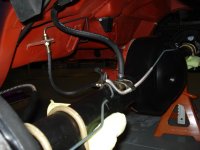
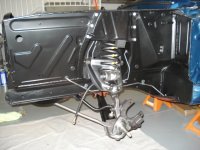
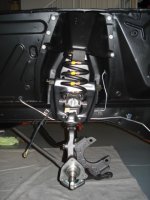
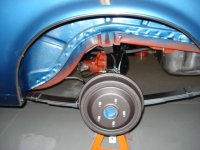
I wanted to share some of the progress with everyone on the j-code. All turned out ok with the the frame - the body shop had to do a small pull but nothing serious and all the seams worked out. It is in getting painted and I am trying like crazy to sell my extra parts and sort through and keep the parts that I need, get them re-finished and ready to re-install. The pics show only about 1/2 of what is going on and thanks to the body guys for sending them as regularly as they do!!!

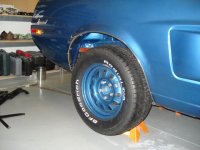
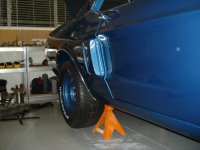
The original color is Diamond Blue - but I am not a real fan, so I am going with Guardsman blue and will do the white stripe. Lots of other photos on the blog, but these are the latest!
 

Attachments

  • IMG_0496.jpg
    IMG_0496.jpg
    70.9 KB · Views: 91
  • IMG_0498.jpg
    IMG_0498.jpg
    78.6 KB · Views: 97
  • IMG_0499.jpg
    IMG_0499.jpg
    81.4 KB · Views: 91
  • IMG_0500.jpg
    IMG_0500.jpg
    79.3 KB · Views: 88

admin

Staff member
Administrator
Joined
Aug 18, 2002
Messages
2,056
Looks great! I like that color a lot. Isn't it awesome seeing color finally laid down? It totally transforms the car.

Good news on the body/frame being able to straighten out OK.
 
OP
OP
X

x-codegtcs

Well-known member
Joined
Sep 5, 2002
Messages
549
Location
Kaysville, UT
Jon, thanks for the +1!

Yeah! I am very excited, but now feeling a bit behind as I want to have most of it ready to reinstall when I get it back and seeing it in paint makes me panic a little.
 
OP
OP
X

x-codegtcs

Well-known member
Joined
Sep 5, 2002
Messages
549
Location
Kaysville, UT
Well the car is home now and I got a couple boxes of goodies from Marty and NPD. I have started to put some simple stuff on and aligning the doors. I will get serious next week and be removing and rebuilding all the suspension components, brake lines, fuel lines, then on to electrical...counting the days!!!
 

Attachments

  • IMG_2745s.jpg
    IMG_2745s.jpg
    91.6 KB · Views: 69
OP
OP
X

x-codegtcs

Well-known member
Joined
Sep 5, 2002
Messages
549
Location
Kaysville, UT
OK - I have seriously been hitting speed bumps on this restoration. I am hoping that I am finished with those now and pedal-to-the-metal! Here are some photos of things I have been doing the last little bit...lots of little part prep that I won't bore you to tears with...just the big mile stones. Thanks for looking!
 

Attachments

  • DSC07646.JPG
    DSC07646.JPG
    57.5 KB · Views: 64
  • DSC07644.JPG
    DSC07644.JPG
    54.4 KB · Views: 61
  • DSC07622.jpg
    DSC07622.jpg
    160.3 KB · Views: 66
  • DSC07618.jpg
    DSC07618.jpg
    65.6 KB · Views: 58
  • DSC07616.jpg
    DSC07616.jpg
    70.7 KB · Views: 60
  • DSC07675.JPG
    DSC07675.JPG
    235.1 KB · Views: 66
  • DSC07669.jpg
    DSC07669.jpg
    226.8 KB · Views: 68
  • DSC07661.JPG
    DSC07661.JPG
    58.5 KB · Views: 59
  • DSC07672.jpg
    DSC07672.jpg
    65.4 KB · Views: 60
OP
OP
X

x-codegtcs

Well-known member
Joined
Sep 5, 2002
Messages
549
Location
Kaysville, UT
OK - please don't flame me on the axle/spring u-bolts. I sorted everything 3 times before I sent stuff to the plating shop. I did clear cadmium, black phosphate and yellow cadmium. They are supposed to be natural (i know now! ;-) ), but they ended up in the yellow cadmium bucket somehow. I guess it is pretty against the black housing.

I have to just say how frustrated I am with 50% of the repop stuff out there. A guy would think that for $170 the @#$$@#@ gas cap would assemble, well it didn't. I had to go to the store to get the right press nuts, drill the holes to match the emblem and get my metric sockets out to attach the thing to the car (the bolt was 10mm head). Another item claimed it came with instructions - NOT.

With that said, I have to tip my hat to the folks at WCCC - they did an awesome how-to video for the proportioning valve and distribution block rebuild. Oh man it made it so easy! Seriously good video.

Anyway, 2 steps forward, one step back, two steps forward. I hope to finish the rear brakes tomorrow and then start reassembling the front end...then onto wiring, A/C, and qtr and door glass...time to send the motor into the machine shop too...
 

somethingspecial

Well-known member
Joined
Aug 13, 2005
Messages
1,795
Very, Very Nice. I love to see great detail, and you have done a great job. Keep it up and keep us updated. Love to see it in person someday.
 

Ruppstang

Well-known member
Joined
May 22, 2009
Messages
3,034
Bryce I certainly am impressed in the amount of detail you are doing in a non concours car. Call me some time I will give you a few tips.
Marty
 

Sarge

Well-known member
Joined
Nov 22, 2002
Messages
333
Location
Folsom, CA
Bryce,
Stellar job, it looks just soooo good! I can't wait to see the final product. Question: do you have a link to that WCCC proportioning valve how to, or was that a video you purchased? Can you post the link if available?

Great Job!!!
Robert
 

somethingspecial

Well-known member
Joined
Aug 13, 2005
Messages
1,795
guys - thanks for the support! I feel like a basket case sometimes and need to put up a dart board in the garage just so I can throw something! My wife thinks I am OCD... 8-/

Nope, You are just like the rest of us who have restored a car to one degree or another. I'll bet there isn't a single one on here who wasn't satisfied with the first attempt, and maybe even the second attempt to get it the way we see it in our heads. My wife has had many a laugh hearing cursing from the garage and seeing a UFO heading out of the garage doors, or car tent. She just yells, "are you OK"?, To which I just grit my teeth and grumble, "I'm Just #*%#$@$ Fine". Just remember, We are here with you, So Vent away if you need to, or ask for advise, or someone to laugh with you. LOL
 

Mosesatm

Well-known member
Joined
Jan 18, 2005
Messages
9,029
Wow Mike, I'm shocked. I have no idea how anyone could get so angry he'd throw something, unless he was trying to install another ******* aftermarket part from Scott Drake that wouldn't fit!!!!
 

Attachments

  • Tin Snips in Wall.jpg
    Tin Snips in Wall.jpg
    50.3 KB · Views: 50

6t8-390gt

Well-known member
Joined
Jul 19, 2004
Messages
490
Location
Central Virginia
Bryce,
Nice job! I once heard that when restoring a car you should restore every piece like it was the only piece a judge would be looking at! I applaud the effort you have taken to restore this car! It looks beautiful already; and it's not even complete!

One of the best things (IMO) about the internet is putting us all in touch with experts we would not have had access to a few years ago. Like many here I'm glad to help and appreciate the help I have recieved!

Danny
 
OP
OP
X

x-codegtcs

Well-known member
Joined
Sep 5, 2002
Messages
549
Location
Kaysville, UT
Danny - thanks! I couldn't agree more about expert availability! You guys have been huge help so far-so many questions answered in the various forum threads! Thanks everyone!!!!
 
Last edited:
OP
OP
X

x-codegtcs

Well-known member
Joined
Sep 5, 2002
Messages
549
Location
Kaysville, UT
A couple of pics from todays work...I ended up with 235/60R14's all the way around.
 

Attachments

  • DSC07677.JPG
    DSC07677.JPG
    150 KB · Views: 63
  • DSC07678.JPG
    DSC07678.JPG
    82.8 KB · Views: 67
  • DSC07679.JPG
    DSC07679.JPG
    57.2 KB · Views: 66
  • DSC07680.JPG
    DSC07680.JPG
    56.6 KB · Views: 65
  • DSC07682.JPG
    DSC07682.JPG
    55.6 KB · Views: 60
Top