• Welcome to the CaliforniaSpecial.com forums! - You are currently viewing the forums as a GUEST. To take advantage of all our site features, please take a moment to join our community! It's fast, simple and absolutely free.

    If you have problems registering or can't log into your account, please contact Admin.

    Please Note: If you are an existing member and your password no longer works, click here to reset it.

. Triple "B's" Garage

OP
OP
R

robert campbell

Well-known member
Joined
Apr 10, 2007
Messages
4,321
All,
I finally wrestled Sheryl’s carb for Gem her 1968 Big Block 390 automatic GT/CS to the ground. Had to get a thread repair kit for the needle and seat hole in the float bowl. Got that done and if anyone has a stripped float bowl, I can fix it.

Well, I performed a few tricks to get it better, but to no avail. It idled like crap and had a large flat spot off idle. Just like before even after the secondary idle discharge port enlargement from .022 to .028 in diameter per the Ford TSB bulletin. I could close down the idle screw on the driver side and kill the engine. The passenger side had no effect. I could tell that the driver side was compensating for the passenger side. Ok engine vacuum, but not steady and a noticeable miss on the right back of the engine. Crap!!

Back off for the 3rd time. Off with the front metering block. Cleaning and blowing out all passages yet again. All seemed clear and was about ready to remove the soft plugs and disassemble the emulsion tubes from the metering block which I have never had to do before.

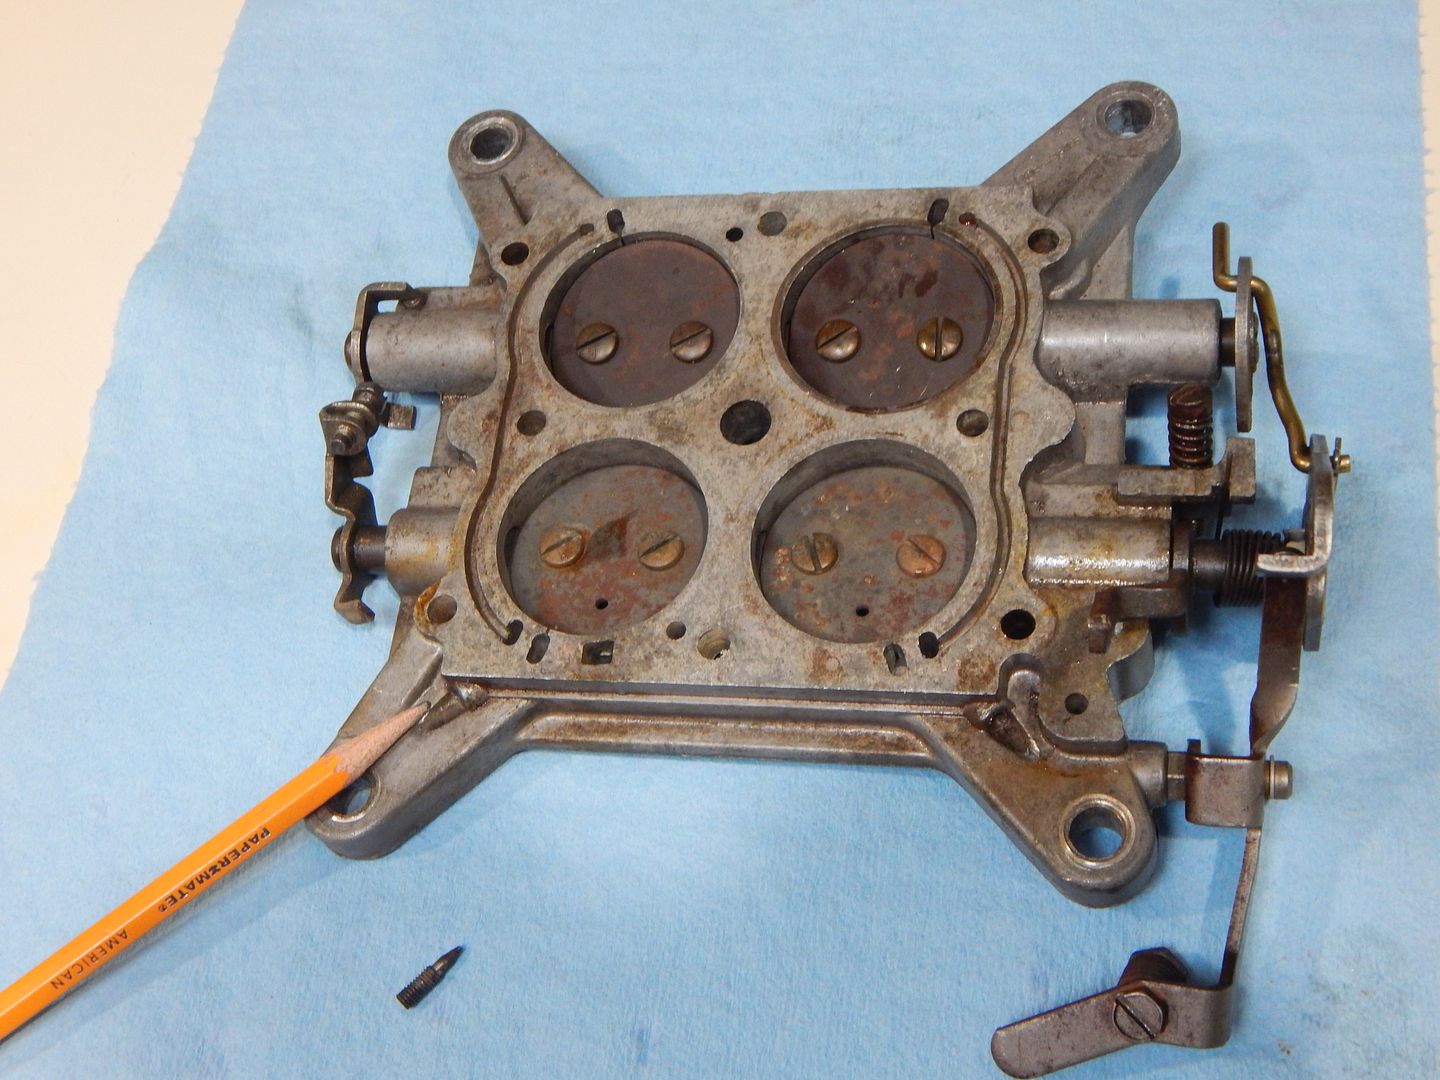
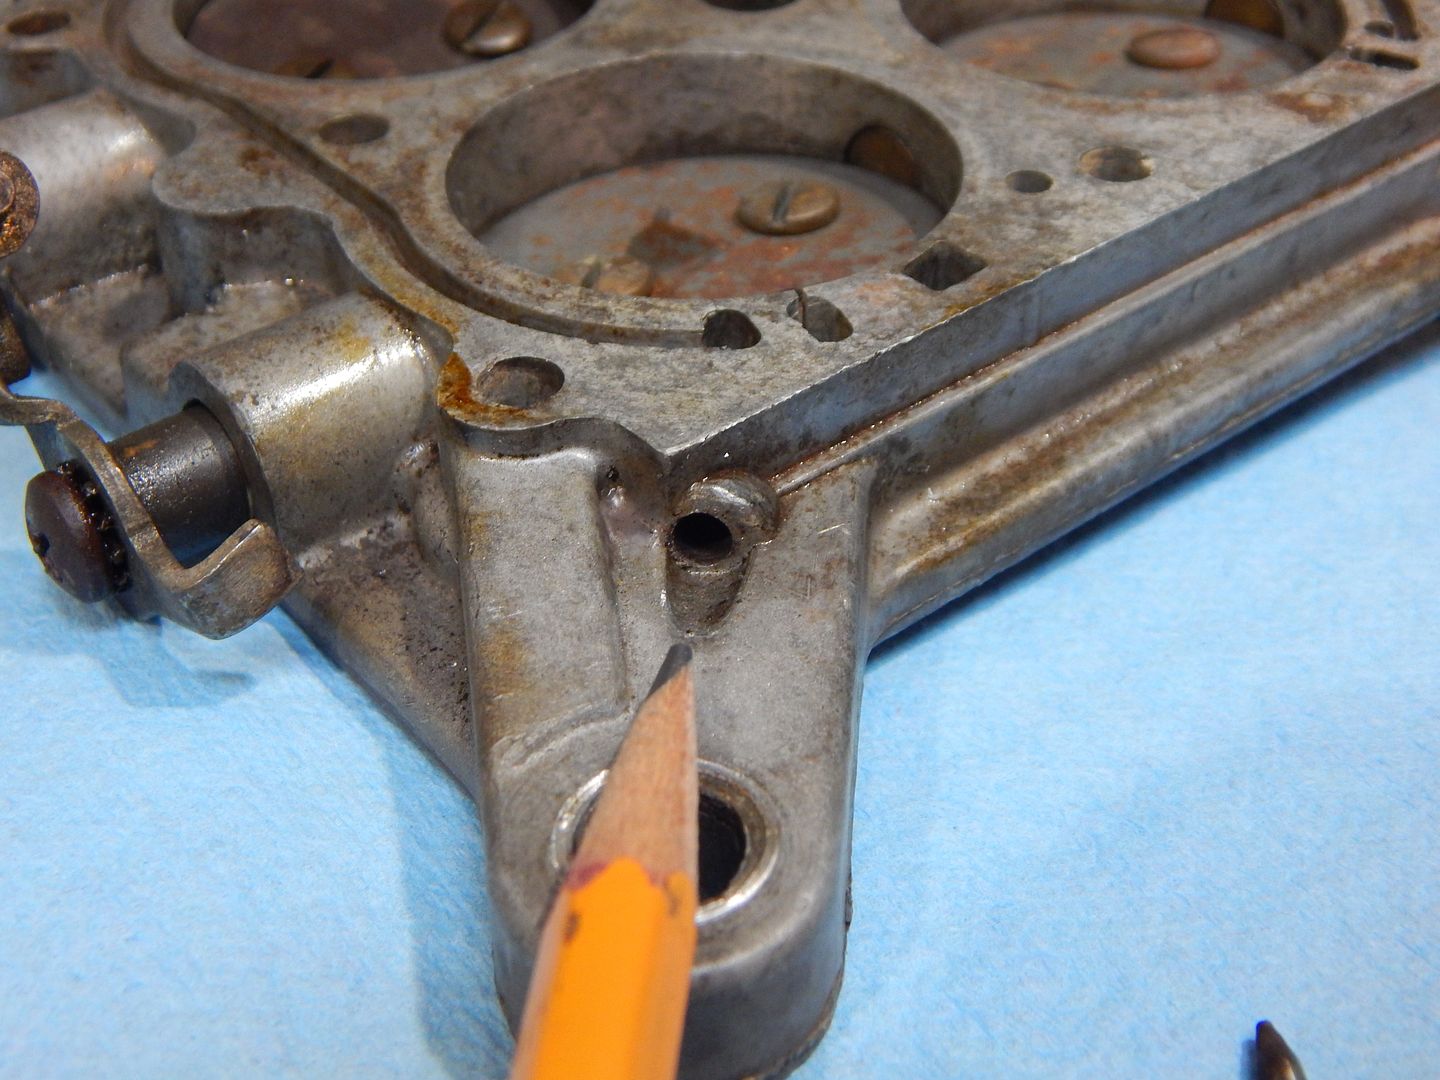
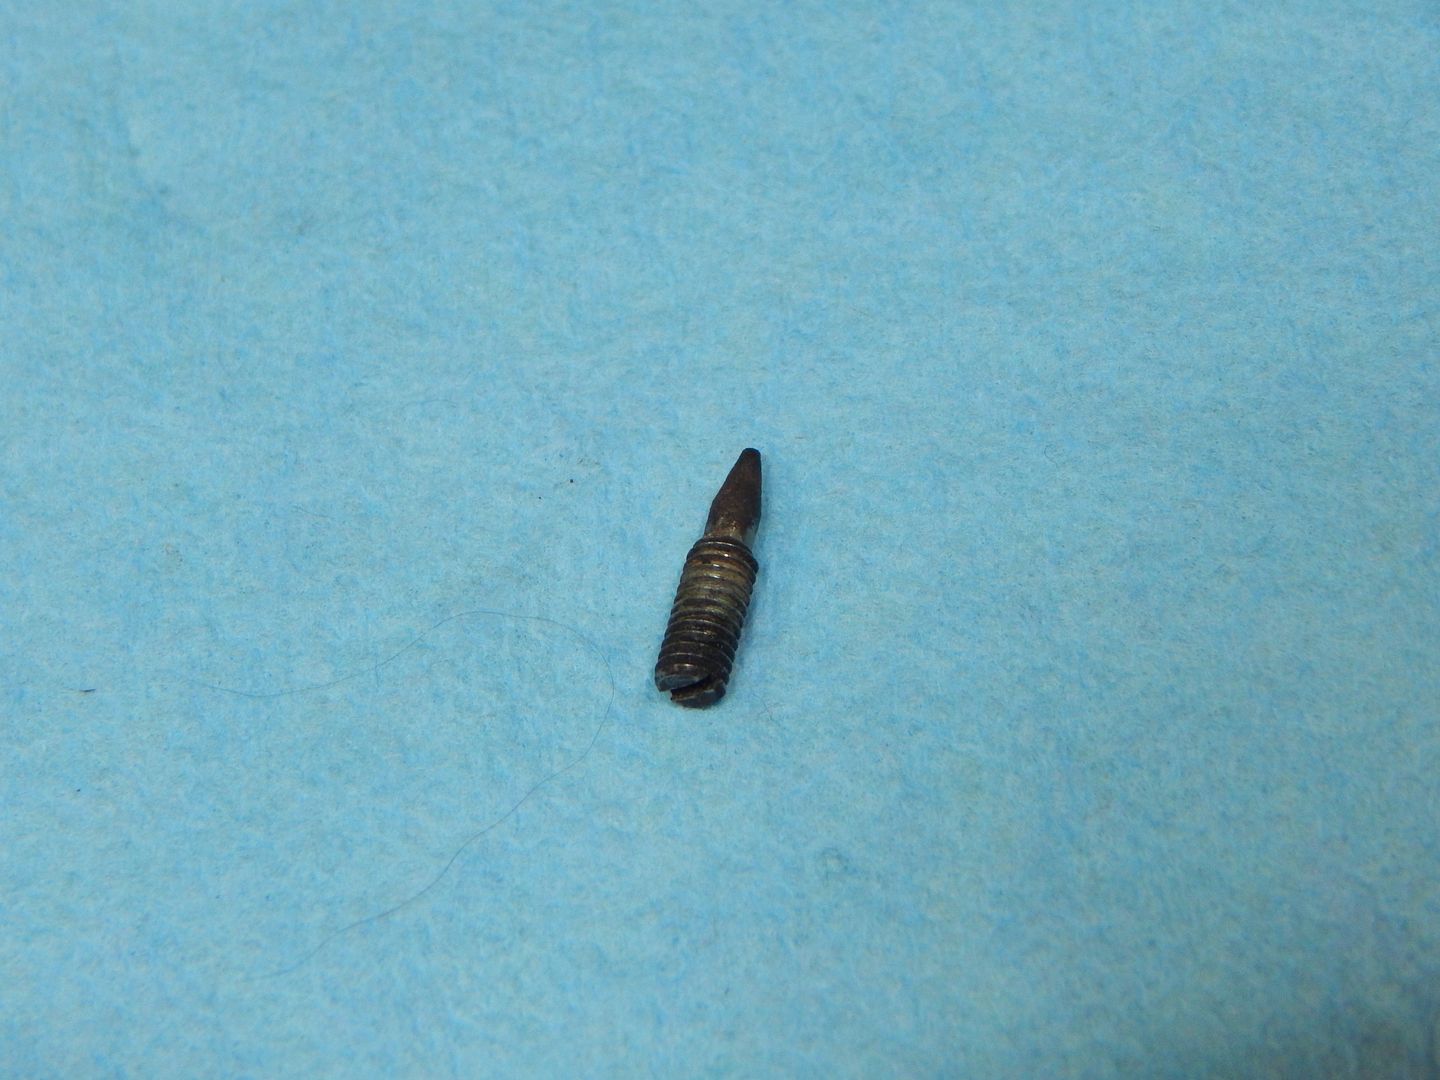
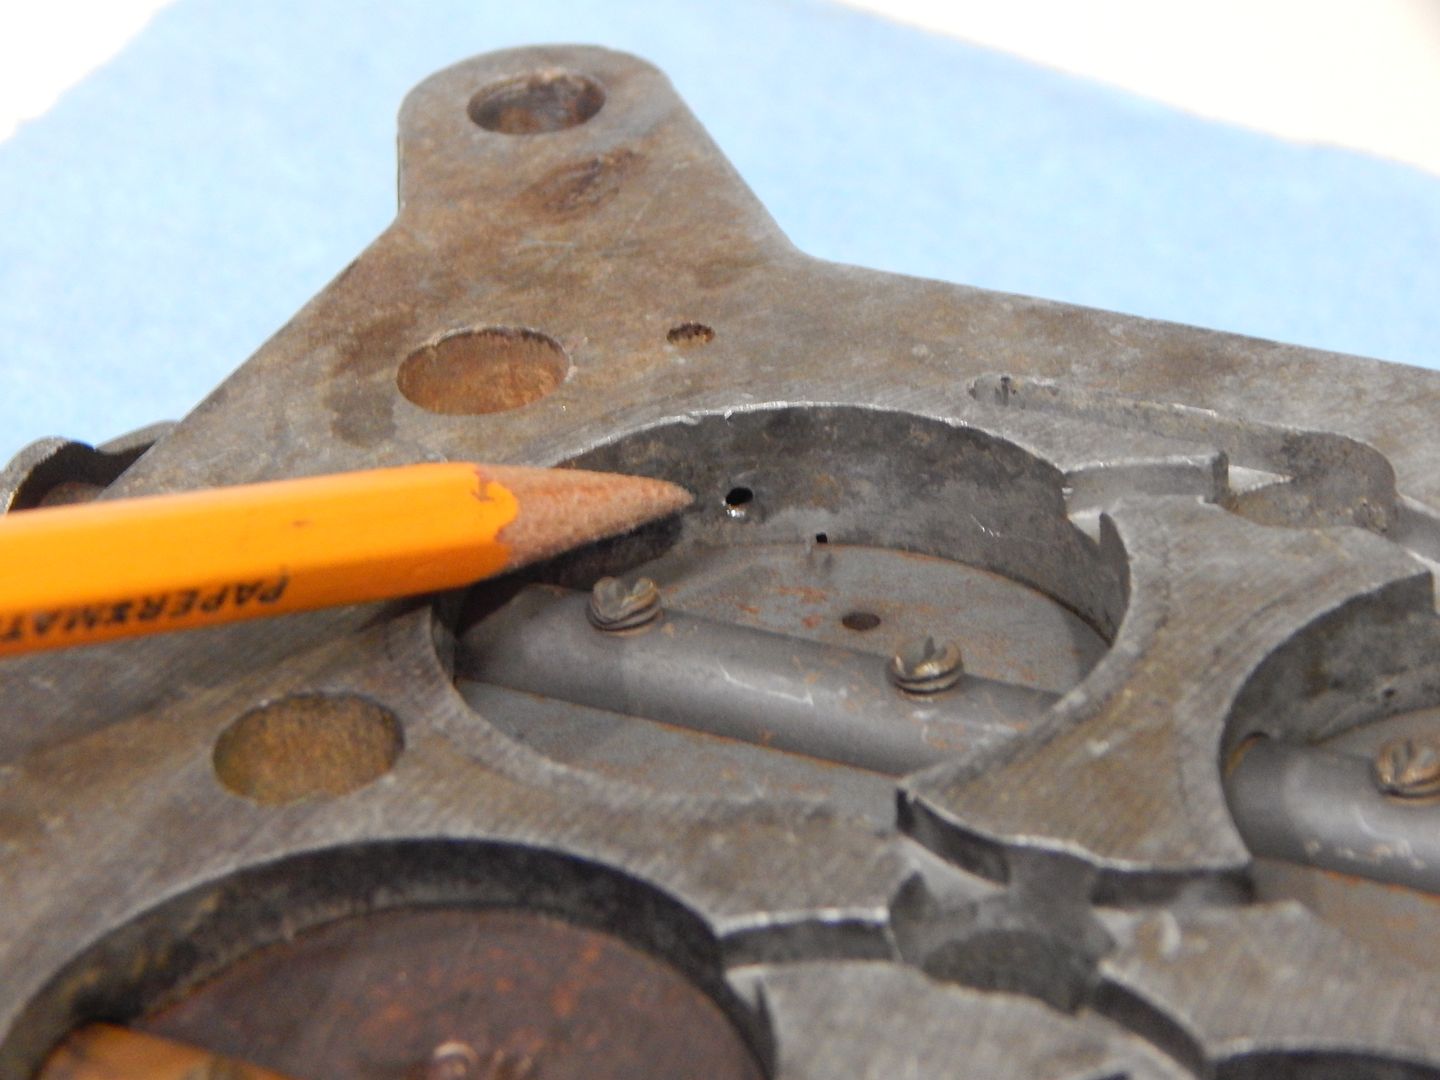
Started to inspect the transfer slots and the idle discharge port in the throttle plate assembly. Got out the magnifying glass and low and behold. This 1968 era Holley has a second set of idle mixture screws and someone had completely closed down the passenger idle discharge port by running the air mixture screw in and bottomed. I have sent this to the Holley tech line and they have never seen this before. Of course it is a tiny screw and stuck from sitting all these years. Out with the blow torch and the Kroil and with some patience I got it unstuck and screwed it out to the same depth as the driver side.

Below are some pictures of this secondary port on these old Holley’s. I would like Dan and Eric to see if they can take a picture of their throttle plate to see if they are there also on their carbs. I bet they are and I learned yet another idiosyncrasy of these carbs.

Sheryl’s carb runs like butter now!! Check out the link and hear it run!!

Rob

https://www.youtube.com/watch?v=xbgc6q5XZ-Q


Marty's new HCS big block has the same screws that I found on a couple other 390 Holley 3795 carbs. His screws came out way easier than Sheryl's did!! Hope to get the Cougar out soon and dial this thing in for Marty. We have a foot of snow on the ground.

Rob
 

Ruppstang

Well-known member
Joined
May 22, 2009
Messages
3,024
I had this carb at two other local shops and it ran so badly I have only 200 miles on this 68 GT 390. I really had looked forward to driving it, but it just was not fun running poorly. In this digitally smart world there are few people that have the knowledge to make our cars run properly like Rob! I was also having issues with the 68 GT 350's 4300 carb that Rob now has running like butter.

FYI Rob the Holley you have off our 68 S code GT was built on 08-24-67, the third day of production at San Jose. It was delivered to Bowles Stamp Ford in San Clemente CA.
So it makes sense that it would have one of theses early carbs.

I can not wait for this Winter to be over (presently 15 inches of snow and had a high today of -7) when I get that carb back and some spring weather we will see what that bad boy will do.

Be careful everyone this is some serious weather.
 
OP
OP
R

robert campbell

Well-known member
Joined
Apr 10, 2007
Messages
4,321
Marty's car/carb must have been recalled and had the Ford TSB secondary idle discharge port enlargement done. It was enlarged to the .028 opening. I am confident that the primary throttle plate screw fix will help its idle and transition to low speed operation smooth like it should be. I will wet test it on my bro-in-laws stock 1969 390 Cougar engine.

This era Holley carb is the only one with this throttle plate idle mixture screw to my knowledge. It also may have occurred on 735 cfm carbs on early 1968 428 Cobra Jet engines.

Rob
 

rvrtrash

Well-known member
Joined
Apr 25, 2003
Messages
3,649
Rob, the idle mixture screws in my 4300D corroded in place and the heads stripped off at some time in the past. I need to bring that throttle plate to you to work your magic on one of these days.

Steve
 
OP
OP
R

robert campbell

Well-known member
Joined
Apr 10, 2007
Messages
4,321
Steve,
Plop it in the mail and I will see what I can do!! Pack it good! One of Marty's carbs looked like it was used in a rugby game! And it bent some linkage up on it.

Rob
 

rvrtrash

Well-known member
Joined
Apr 25, 2003
Messages
3,649
Once I can get everything unpacked and organized, I'll get it going your way. Hopefully not more than another month, but there's no great rush anyway.

Steve
 
OP
OP
R

robert campbell

Well-known member
Joined
Apr 10, 2007
Messages
4,321
Marty should get his 3795 Holley in the A. M. tomorrow. A rebuilder had installed a 6.5 power valve instead of a 7.5. Got it dialed in very nice on the 390 Cougar at my disposal. Might have dropped in to an 8.5 as the idle circuit on these carbs was so lean due to the start of the emission warfare on cars in 1968.

Wish I would have had his car in my shop to ensure the dial in was perfect. i think it is very close.

Rob
 

Ruppstang

Well-known member
Joined
May 22, 2009
Messages
3,024
I got the carb last night and could not wait to get home and install it. I got home to find we had guest for dinner and they stayed for a while. Needless to say I did not get the cab on the car. May be tonight.
 

Ruppstang

Well-known member
Joined
May 22, 2009
Messages
3,024
I got the carb installed and the car running today. Oh my goodness it runs like a different car!! I had not been able to drive any of our cars for almost 3 month so it was a real treat to drive the 390 and having it running properly. I think now the carb is right I can tune it even better.

THANK YOU! Rob
 
OP
OP
R

robert campbell

Well-known member
Joined
Apr 10, 2007
Messages
4,321
Hello All,
Back at Triple B's Muscle Car Clinic. This is the winter of Rob, and he gets to work on his own car! What a concept! Time for one last build!

Rob has decided on an all-aluminum 427 based FE build stroked to 511 cubic inches with a 12 to 1 compression ratio for his 1967 Mustang Fastback. Shelby aluminum block and either ported Shelby aluminum heads or ported Bare Block Motors (BBM) aluminum heads. REF headers and a BBM tunnel wedge dual quad intake manifold with two nostalgic Holley 660 CFM “center squirter” carbs. Hydraulic roller cam with a redline right around 6,500 rpm. All the good stuff in the crank, rod, and piston arena and fully balanced. Should produce between 750 and 800 HP! Still running it through my hardened Toploader 4 speed. The poor tranny may be the weak link.

I put the Stang on the track with my 460 stroked Boss 351 crate motor last summer. Got it down to 11.50’s in the quarter with horrible 60-foot times. Not as fast as David Athans, but 4 speed cars are a hand full at the starting line, Tire spin on drag radials. Launching a bit too hard but was satisfied with the performance on three different outings. Broke my stock 9-inch housing leaf spring pedestals and spun the front of the rear end up into the top of the tunnel. What a noise on my first launch on my first day. Did not spit out the driveline and I limped back into the pits for the “tow truck phone call of shame”!! It now has a Quick Time massively supported rear end housing and a pinion snubber and that problem is gone. The Nodular case and 35 spline axels work great! All you need is money! I sold the complete motor from carb to pan, headers, full exhaust system, and a 5 speed TKO 600 to a friend. It is gone!

So, I have had a 428 Cobra Jet in this car back in the day. And I owned a 68 Shelby GT-500 KR with pent roof valve covers before. As we all know working on an FE in a Mustang is one pain in the butt. So Rob has gone the extra mile and is installing an “Aussie” strut system in the front end from Revelation Racing Supplies (RRS). Their kit allows you to “notch” the shock towers. It eliminates the upper control arm, the coil spring, and the shock and replaces it with a single strut. It makes about 11 inches of more room. It also retains the top of the shock tower to use the shock tower to firewall braces. These are important for a Mustang without a 12-point cage in them. My car has the Maier Racing subframe connectors, but I refuse to put a cage in it. I see people cut the entire front out of an older Mustang and totally eliminate the shock towers and firewall bracing. It is my opinion that this is not a good way to and creates a hinge/weak point right under the firewall. A 12-point cage allows you to brace the frame all the way to the radiator support and eliminates this weak point.

So, enough blah blah blah. Check out these pics, that more than likely are sideways, until someone helps me rotate them. Since these pics, the notch plates are in but not quite finished. Should be done today. This conversion requires a bit of skill to do, so don’t think it is easy. I have about 8 hours of grinding and fitting invested so far. I will leave and paint the raw welds. They look to cool to smooth out!! More pics soon!

Rob
 

Attachments

  • Shock Tower 2.jpg
    Shock Tower 2.jpg
    93.1 KB · Views: 45
  • Shock Tower 4.jpg
    Shock Tower 4.jpg
    102.6 KB · Views: 37
  • Shock Tower 5.jpg
    Shock Tower 5.jpg
    102.6 KB · Views: 33
OP
OP
R

robert campbell

Well-known member
Joined
Apr 10, 2007
Messages
4,321
Dudes,
Check out the welding on these shock towers! They are welded in on both sides for extra strength. I do not weld but have a good friend that does. He was a nuclear pipe welder at the Puget Sound Naval Shipyard! This shipyard is the MIT of shipyards and a good welder from this yard is the best of the best! This was child's play for him, but me being an old Sheetmetal Mechanic from the same shipyard, the fit was very close with little to no gaps. I learned early on the have my work clean and gap free for the best look and fit.

Rob
 

Attachments

  • Shock Tower 6.jpg
    Shock Tower 6.jpg
    106.2 KB · Views: 40
  • Shock Tower 7.jpg
    Shock Tower 7.jpg
    101 KB · Views: 40

CougarCJ

Well-known member
Joined
Jul 17, 2006
Messages
2,185
Very nice work.
All of your clutch and bell housing stuff is SFI rated?
Planning on sub 11's or better?
 
OP
OP
R

robert campbell

Well-known member
Joined
Apr 10, 2007
Messages
4,321
Very nice work.
All of your clutch and bell housing stuff is SFI rated?
Planning on sub 11's or better?

Mcleod twin disc clutch. 1200 HP rated. Quick Time scatershield. Both SFI rated. Also have driveshaft loop and full Calvert Racing mono leaf's, shocks and traction bars. 28-inch-tall drag radials. May need to mount up some real slicks. Not sure how low I can set pressure on drag radials. Also, will need to screw the slicks to the rims.

Yes, sub 11's or better.
 
OP
OP
R

robert campbell

Well-known member
Joined
Apr 10, 2007
Messages
4,321
Wow Rob you have been a busy guy. Nice work!

Busy busy busy! Thanks for the compliment. This is not a trailer queen or show winner! I want fast and fun!!

I also will post a pic or two of a long-term project I have. A 40 Ford full tube frame chassis track car with 4 link powered by a 1965 center oiler 427. It will be stroked and full of all the good stuff.
 
OP
OP
R

robert campbell

Well-known member
Joined
Apr 10, 2007
Messages
4,321
A long term project. Been sitting for 30 years due to the builder being killed in a jet ski accident. I love the plastic mockup motor I bought. More pics as I move along.
 

Attachments

  • Mock Up Rear End Right Side.jpg
    Mock Up Rear End Right Side.jpg
    141.9 KB · Views: 37
  • Mock Up Front View.jpg
    Mock Up Front View.jpg
    142.8 KB · Views: 33

rvrtrash

Well-known member
Joined
Apr 25, 2003
Messages
3,649
Let's see if I got it right.
 

Attachments

  • Shock Tower 6_1.jpg
    Shock Tower 6_1.jpg
    220.6 KB · Views: 36
  • Shock Tower 5_1.jpg
    Shock Tower 5_1.jpg
    211 KB · Views: 45
  • Shock Tower 4_1.jpg
    Shock Tower 4_1.jpg
    213.6 KB · Views: 39
  • Shock Tower 2_1.jpg
    Shock Tower 2_1.jpg
    190 KB · Views: 29
  • Mock Up Rear End Right Side_1.jpg
    Mock Up Rear End Right Side_1.jpg
    127.8 KB · Views: 29
  • Mock Up Front View_1.jpg
    Mock Up Front View_1.jpg
    127.6 KB · Views: 36
  • Shock Tower 7_1.jpg
    Shock Tower 7_1.jpg
    208.4 KB · Views: 30
Last edited:
Top