• Welcome to the CaliforniaSpecial.com forums! - You are currently viewing the forums as a GUEST. To take advantage of all our site features, please take a moment to join our community! It's fast, simple and absolutely free.

    If you have problems registering or can't log into your account, please contact Admin.

    Please Note: If you are an existing member and your password no longer works, click here to reset it.

1968 Brake light issue with lights on

Ersel66

Well-known member
Joined
Sep 4, 2009
Messages
61
I was checking all my rear lights and noticed when I put the driving lights on the brake lights on one side do not work. They work when the lights are off, but not on. Anyone else have that issue?

Also, one side is brighter than the other--maybe I should replace all the bulbs!? Are they all #1157's?

Thanks
 

aemoo28

Well-known member
Joined
Nov 1, 2007
Messages
1,127
Location
The Great Northwest
No no no your issue is you have halogen headlamps in the front, right?

They short out the system. Ask Rob. We just went thru this.

Replaced fuses, brake light switch, and something I forget. Ordered FoMoCo NON halogen lamps from Ron (clubpro).

Rob "I can hang upside down under the dash" pipe in at any time.
 
OP
OP
E

Ersel66

Well-known member
Joined
Sep 4, 2009
Messages
61
Just checked...I have one that is a GE and the other is a "Made for FoMoCo." They look to be very old and def not halogens
 

aemoo28

Well-known member
Joined
Nov 1, 2007
Messages
1,127
Location
The Great Northwest
Anyway it started with one side not working when brake pressed. Then only tail lights worked, then dash went out and noticed the headlights dimmed when I depressed brakes. So then no tail lights, no brake lights, no horn, no dash lights, then turn signals went out. I only knew I had no brake lights when a man pulled over next to me at the gas station and told me it would not be a pretty day when I got rear ended in my fancy Mustang.

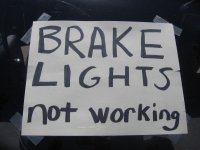
Up went the sign. Remember this, Rob?
http://californiaspecial.com/forums/attachment.php?attachmentid=9585&stc=1&d=1252223173

Went to Dr. Rob and Mike G and it was an easy fix. Fuse, switches, etc.

Those headlights. Change them over.

*** Ah I see this isn't the problem. I apologize. Interesting.
 

Attachments

  • Satan in pictures for CS.com 004.jpg
    Satan in pictures for CS.com 004.jpg
    63.1 KB · Views: 26

robert campbell

Well-known member
Joined
Apr 10, 2007
Messages
4,321
Ah…. California Special taillights…… What fun…

Amy’s car had two problems. The brake light switch and the headlight switch. The halogen headlights do increase the load on the headlight switch. Satan’s was old and its failure turned off a lot of stuff. Her taillights were an easy fix for a young person who loves to contort himself or herself under the dash…. Simple brake light switch replacement fixed Amy’s problem. Yours is bigger IMO.

The first thing I would do is find the ground wire for the taillights. They are mounted in fiberglass and the ground wire is critical. With the trunk open look down the right side of the frame that surrounds the trunk lock mechanism on the inside of the trunk. There should be a small screw holding two black wires. Make sure that the metal is shiny and the wires are not broken loose from the clip that the screw attaches them to the frame.

Take both lenses off. Makes sure one side has not lost its reflective capability. More than the other. 4 screws for the outer ring and 4 screws for the lens.

My guess, from the keyboard, is that you turn signal switch is failing. I have seen a lot of people chase the harness from the back to under the dash, and into other areas. This is where Amy’s suggestion is a good one. Neil (franklinair) turned me onto the new LED taillight bulbs. They draw far less “current” than the traditional 1157 bulb. The turn signal switch carries the load of the taillight and brake light filament. The turn signal switch was designed to hold the draw of two taillights, not 6. It is my opinion that this leads to turn signal switch failure on our cars. Replacing it is fun, but we can step you through it.

Digest the above. Steve Wick, (rvrtrash) is the expert. He may have some other simple things to check.

Rob
 

franklinair

Well-known member
Joined
Mar 1, 2007
Messages
4,744
+1 on Rob's comments. Make sure the ground connections are good, possibly even the tail lite bulb sockets (they sometimes get corroded).

Neil
 

robert campbell

Well-known member
Joined
Apr 10, 2007
Messages
4,321
When I "refurbed" my tailights, I replaced all the sockets and soldered an individual ground to each socket. Overkill I suspect, but no grounding problems.

Rob
 

rvrtrash

Well-known member
Joined
Apr 25, 2003
Messages
3,650
I would guess at one of two things. First, as previously mentioned, you may have a ground problem. There is a wire screwed to the metal housing the light sockets are in that goes to the plug on each side and winds up by the gas fill neck that Rob talked about. If that is broken somewhere, you would see this problem. Do you have an ohmmeter to check it out? The next possibility is a shorted bulb or corroded sockets, like what Neil was talking about. Without going into a lot of detail, it sounds like your ground path is going through the second set of elements in the bulb and finding a ground elsewhere, rather than straight to the body.

Steve (And I appreciate the sentiment, but don't consider myself an expert. I did however stay at a Holiday Inn Express once. :grin:)
 
OP
OP
E

Ersel66

Well-known member
Joined
Sep 4, 2009
Messages
61
Thanks for all the thoughts and comments guys. I checked all the grounds and they look fine, however it looks like one was moved to the lock area where it is painted--does paint make a difference in getting a good ground.

I did replace all the bulbs and I noticed all three lefts are brighter than the three NEW rights. The rights are just glowing and not real bright. Does that help diagnose my issue?

Also the turn signal lever only clicks up & not click down. For some reason the click part must be broken--could that be it too?!
 

robert campbell

Well-known member
Joined
Apr 10, 2007
Messages
4,321
Clean the grounds! Make sure they are shiny metal to metal! Comments on the turn signal switch scare me. Make sure the sockets are clean.

I have replaced my turn signal twice. Once in 1989 and again two years ago!

Rob
 

Ruppstang

Well-known member
Joined
May 22, 2009
Messages
3,032
If you have some test leads, wires with clip clamp on the ends. You can find a good ground point and clamp to it, clamp the other end to tail light bucket. See if that improves the bulb brightness. At least you will know if it is a ground issue. I would put money on the turn switch. I just changed one in a 67 two weeks ago. On it when you hit brake or flashed turn signals it honked the horn. I thought someone had messed up the wireing. A new switch cured it. Nothing a $100 and some patience can't fix.
Marty
 

rvrtrash

Well-known member
Joined
Apr 25, 2003
Messages
3,650
Paint makes an excellent insulator. You need to be bare metal to bare metal. It sounds like you also need a turn signal switch because of the cancelling cam. Arlie (Mosesatm) was kind enough to point out to me that my brakes only worked on one side when the car was running because my switch did the same thing. I replaced it which solved that problem but I've just discovered the turn signals flash real slow when the lights are on. I don't drive the car much at night so didn't notice until recently. What I'm driving at is, the replacement switches might not be the best quality. Good luck. Sometimes I think all electrical systems were designed by Lucas, or people he taught.

Steve
 
OP
OP
E

Ersel66

Well-known member
Joined
Sep 4, 2009
Messages
61
I'll re-check the ground tomorrow.

How easy is it to replace the turn signal switch and anyone have a part # I would need from one of the repro Stang sites?

Thanks again!

P.S. Can someone explain in laymans terms how to check with a meter if it is the proper ground, etc? I have an OHM meter (DC meter), but really don't know what to do with it in this instance.
 

rvrtrash

Well-known member
Joined
Apr 25, 2003
Messages
3,650
P.S. Can someone explain in laymans terms how to check with a meter if it is the proper ground, etc? I have an OHM meter (DC meter), but really don't know what to do with it in this instance.

Set your meter on the ohms position. Touch the two leads together to make sure it shows 0 ohms. Unplug both light buckets where the wiring comes through the taillight panel. Put one meter on the ground terminal of a main harness plug and the other on a bare spot of metal in the trunk. The meter should show 0 ohms. Do the same with the other. Now measure from the ground terminal on the light bucket side of the harness to one of the power terminals. It should read between 1 and 2 ohms for each of the power terminals as you move the lead to each one.

Steve
 
OP
OP
E

Ersel66

Well-known member
Joined
Sep 4, 2009
Messages
61
Steve-
Thanks for the tips. Looks like it will have wait until next week or so...back to work!
 
OP
OP
E

Ersel66

Well-known member
Joined
Sep 4, 2009
Messages
61
If you have some test leads, wires with clip clamp on the ends. You can find a good ground point and clamp to it, clamp the other end to tail light bucket. See if that improves the bulb brightness. At least you will know if it is a ground issue. I would put money on the turn switch. I just changed one in a 67 two weeks ago. On it when you hit brake or flashed turn signals it honked the horn. I thought someone had messed up the wireing. A new switch cured it. Nothing a $100 and some patience can't fix.
Marty


Hey Marty-
How challenging was the turn-signal switch project?
 

Ruppstang

Well-known member
Joined
May 22, 2009
Messages
3,032
The Information in Rob's thread is good. I would add before you start pulling out wires make a drawing of the plug note all the pin locations and wire colors. I run a pull wire through and use some electrical tape all the wires to it. Be sure to spread them around so it is a tapered bundle. A little liquid soap and a gentle pull will do it. I can do one in about 30 min. Take your time and I am sure you can do it. If you have trouble PM me. Marty
 
Top